The Great Fence Project of 2007
We had been using the cheap and easily set-up polywire mesh from Ken Cove for serveral years for the dog yard perimeter fence. It worked passibly, but since it was easily grounded on vegitation (especially our ubiquitous tumble weeds) and damaged by the weedeater in attempts to keep stuff from growing on it, we'd finally just turned the power off. Dulcie and Rogan still stayed inside for the most part, but Anya got in the habit of slipping under so she could harass the quail and bunnies in the brush behind the house. Since she wasn't compelled to come back right away, and she had a tendency to zip off when we needed to be someplace, the situation wasn't acceptible.
Thus began The Great Fence Project of 2007.
Below are a series of chronological blog entries I did on the fence's construction for your edutainment. As you can see it took a while to complete since we both work full time and have a little 'supervisor' that requires a lot of attention. I would guess it could have been done in a week or less if we'd been able to devote all our time and attention to just the project.
There are a lot of
great references on the web, but the two below were by far the most helpful
I was able to locate:
http://www.gateway-alpacas.com/farm-fencing
http://www.staytitefence.com/fence-design/how-to-build-a-fence.htm
Enjoy.....
July 22
Saturday we went to the farmer's market, then Babycakes decided to do a major meltdown. I sent husband home with her in one vehicle while I ran errands solo with the other, and she slept most of the afternoon. Which was good since husband, dad, and I spent considerable time figuring out where the permanant dog yard fence will go and staking it out. Fortunately dad had a 330 foot tape measure and familiarity with trig, so our fence will be reasonably square. Then I had to pull up 165 feet of the polywire mesh and put it away, and rearrange the remaining 165 feet of polywire mesh so that when the tractor comes to drill holes we'll have everything out of the way. Next step will be spray painting where the holes go.
July 28
We've marked out where all the holes will go for the new dog fence so the next step is getting the husband of a co-worker to drill the holes when he gets a chance. It will be a MAJOR undertaking that we'll be glad to have done.
Aug 9
After nearly 5 years
of temporary electrified polywire fences, we're FINALLY putting in a permanent
fence for the dog yard. Details:
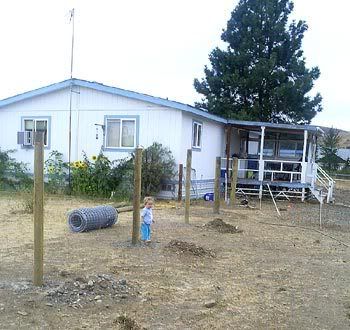
- The line posts are 4"-5" 8' long treated rounds that will be tamped
into the ground with gravel.
- The corner/brace posts are 5"-6" 8' long treated rounds that will be
set in quick dry cement, as our soil is sandy enough that these might
not set correctly otherwise.
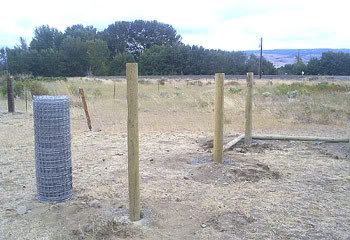
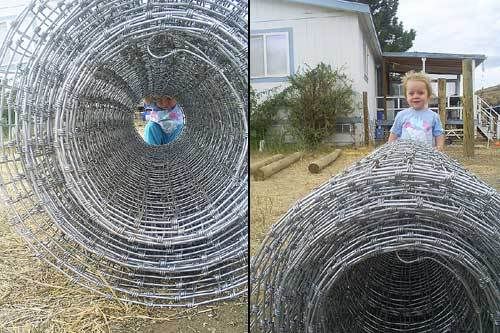
- The wire will be 300' of 48" tall 2"x4" square knot mesh, properly tensioned
(we hope!).
- Since the house and the shed are already part of the yard's border,
the final dimensions of the yard will be 129' x 66'.... a little smaller
than what we have now, but certainly big enough.
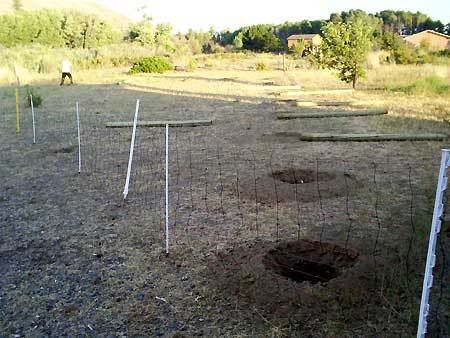
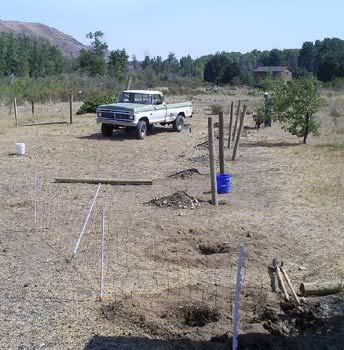
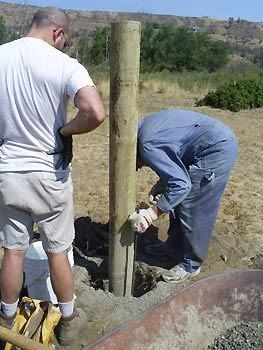
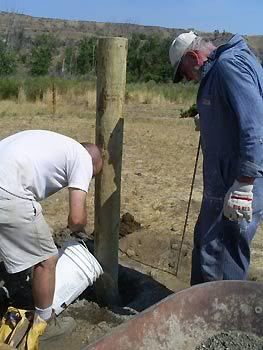
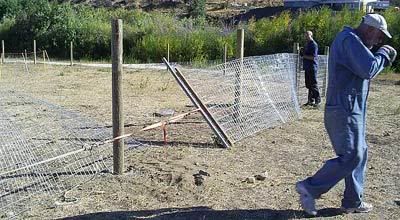
All the posts have been purchased although the big posts are still at the lumber yard since husband didn't have enough room in the pickup for all of them. We had a co-worker's husband come out with a tractor to drill the holes with an auger, but our soil is so sandy and dry that they slumped in immediately. They also needed to be a little deeper so there was some digging to do on the bottom. This has proven to be somewhat difficult, time consuming, and... well.. infinitely irritating to the man of the house, LOL. But with each line hole dug out to the right depth and fence posts in it ready to get tamped down properly, we're making progress. The corner and bracing posts will most likely come home Saturday. Dad has some ideas for getting all that lined up.
Random project pictures:


Aug 11
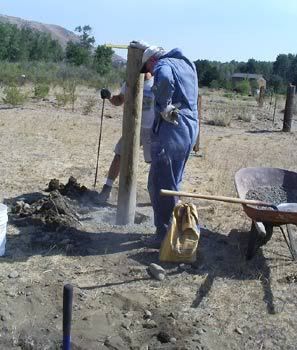
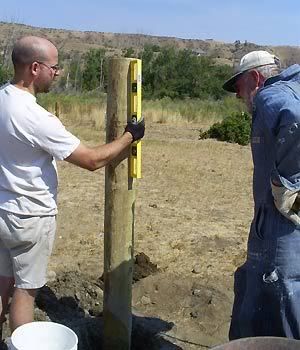
Today's fence progress: dad came over and helped set the corner posts in quick dry cement. The secret was putting a little gravel in, then bonking the post a little this way and that until it was level. Then quick dry was added, a piece of long rebar used to poke at it, water poured in, more poking to make sure it was well mixed, re-bonked until level, maybe a little more gravel.... anyway, they're in, they're straight, and they should be solid by tomorrow.
Quick dry cement comes
in 80 pound bags. Good thing I'm already scheduled with the chiropractor
this week, because I think I'm going to need it. :(
Aug 19
Things are getting
a little stressful around here what with not really knowing what we're
doing when we get to the stretching part and dealing with corners, but
we plug along with what we're sure of for now.
Looks like this adventure is going to come in at around $1000, which is
more or less where we thought it would end up. Almost everything has been
purchased, with husband making another trip to town to get a few small
needful items. It was raining earlier and then the wind came up, so dad
declared a rain day and husband gratefully went with that notion.
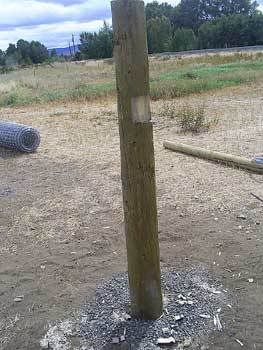
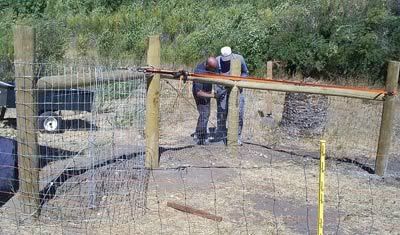
Posts are now set and husband is starting to saw up a few cuts where the
bracing boards will go and then chip the slot out with a chisel. Next
will be installing tensioned wire between the posts and drawing them together.
Husband working on cutting out slots on a post for the bracing board,
with a nervous BabyCakes supervising.
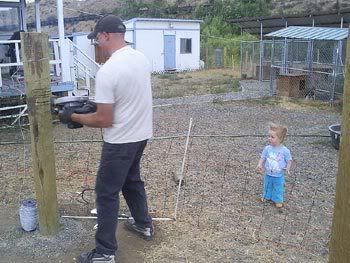
More supervising and inspection from BC:
Hey, the boss is wandering off! What will we do with ourselves?!?
Aug 24
Wow, could it be that
we'll have an end in sight soon? HUGE thanks to husband, dad, and mom
who all kept working on it while I was at work....
I'm including pictures of the corner and end post slot-cutting and bracing.
The wire mesh has already started to be hung and stretched, and should
be completed tomorrow. More pics to come!
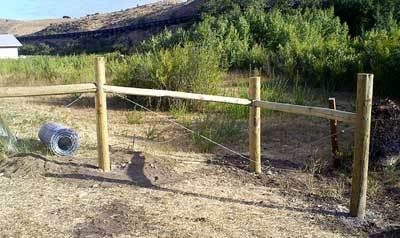
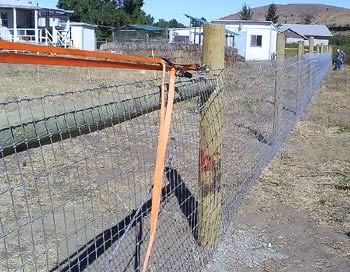
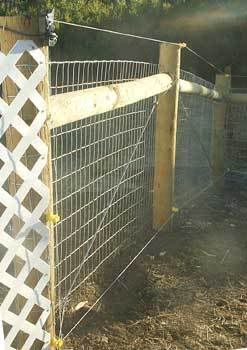
Below you can see a slightly complicated end-piece of the fence (the shed
is just to the left of the shot so the left brace goes to the last post).
You can also see how the brace wire has been arranged. Instead of using
the traditional 'twitch stick' to get some tension on the brace wire,
we discovered clever little clamps made by Gallagher instead. One just
loops and staples the wire around the posts in their prescribed fashion,
puts the 2 clamps in the middle of the wire loop created, then starts
hammering the clamps towards the posts. Ta-da- tensioned fence wire that
can easily be tightened further later on! The result is much cleaner than
the stick method IMO.
Aug 25
 We're
all tired, but now it's just down to me setting up the electric wires.
*whew* This update is going to be heavy on pictures since this portion
of the project was by far the one that presented the most challenges.
There were a few things we probably could have done better, but the end
product is great regardless of our inexpert methodology.
We're
all tired, but now it's just down to me setting up the electric wires.
*whew* This update is going to be heavy on pictures since this portion
of the project was by far the one that presented the most challenges.
There were a few things we probably could have done better, but the end
product is great regardless of our inexpert methodology.
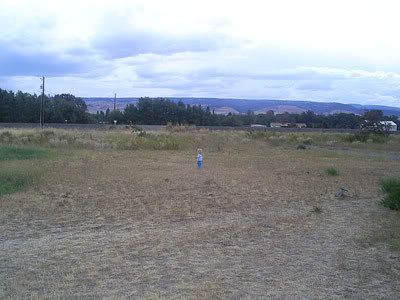
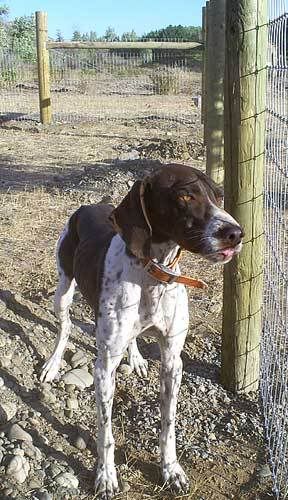
I'm going to begin at the end, then work through this chronologically.
So to our right, I present: The Face That Launched a Thousand Bucks...
and 300 feet of fence and serveral hundred fence staples and and and....
that would be ANYA, the escapist. Why yes she IS sticking her tongue out
at us, LOL! She just can't seem to resist chasing bunnies and quail if
she can find a way to weasel under the fence. Fortunately she's not terribly
bright and gives up if she has to make a significant effort, so this fence
should do us fine.
Tensioning fence was the part we collectively knew least about. And this
was personally worrisome since energy being incorrectly applied to long
stretches of wire can result in the sorts of murky and frightening fencing
tales that often surface in rural folklore. "So there was this farmer
who hooked the fence wire to his truck and asked his wife to give it a
LITTLE bit of gas...." Those tales just never end well. Trust me.
But dad and husband had stretched and tacked up top and bottom on the
section closest to the house already last night without harm to anyone
or anything, and it looked good, so we were off to the races. While they
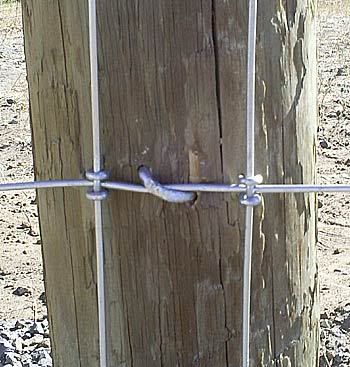
worked on setting up for stretching from the other end, I nailed down
the fence on every other horizontal wire. There are two simple tricks
to remember on this part: make sure to just staple the horizontals sufficiently
to hold them up but not too tight so the fence can expand and contract,
and put the sharp ends of the staple in at an angle to prevent the post
from splitting along a single grain. Below is an example of something
like you're supposed to be doing.
Meanwhile, husband and dad had the fence wire pulled into the middle section
using a comealong attached on one corner post. Dad came up with a home
fence pulling tool by wrapping wire around a metal post, then nailing
boards over the lapped ends tightly. This ended up holding quite well.
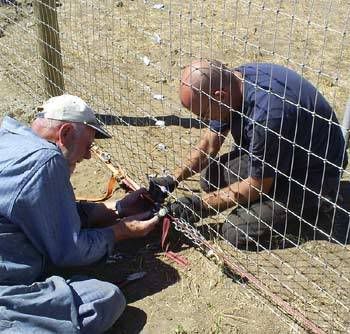
However, going around the corner farthest away from the house presented
a problem. This was resolved by using 2 wire clamps and a couple more
ratchet straps to tension up the longest run in addition to the fence
puller rig keeping tension around the angle. This probably isn't the 'professional'
solution and some of the wire was a little deformed around the outside
of the post from being pulled... but it worked!

Then husband and dad left me stapling up the tensioned long stretch while
they pulled the last wires one at a time with clamps and ratchet straps
connected to posts in opposite directions, trimmed the excess, and fastened
them together. We had bought fasteners that SHOULD have worked very cleverly,
but unfortunately we made a discovery after buying them: the top and bottom
wires were significantly larger gauge and worked fine with the fasteners,
but the middle wires were smaller and the friction fasteners didn't hold.
Husband and dad still used the fasteners to make the join neater, but
had to make knots on either side, which added a lot more time and futzing.
Meanwhile I was trimming stray wire ends, turning them all to the outside
and taking a quick swipe with a file just to get the worst of the sharp
edges a little duller.
With the last of the major sections of fence wire done, dad and husband
left me pounding in staples as they did the last little bit by the shed.
Since it was very short and sloped downhill, they had to work the wire
a little bit and get creative with the pulling methodology to get it all
to work... but work it did. And that was it for the fence wire!!!!
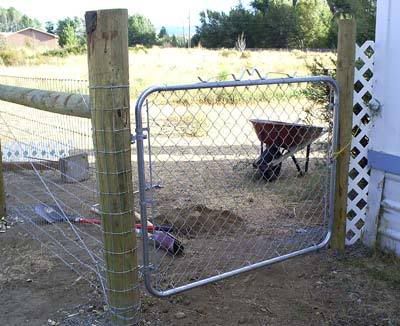
Next up was mounting the gate nearest the house and filling in from the
end posts to the house and shed respectively. Now I'm sure SOMEONE out
there has actually dug a post-hole close enough to a building to not let
a dog weasel through.... but an extremely tight fit is required, and it's
very tough when there's little room to work, and it's a little nerve wracking
since we're not entirely sure where leftover electric and cable lines
might be running from the buildings into the back yard (the previous homeowner
fancied himself an amateur electrician and the most visible examples of
his craft had to be removed and inspected before we could legally purchase
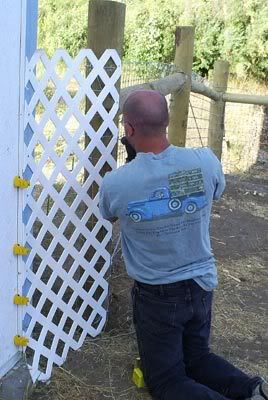
the house). So we do a cheat we've used in other areas in the past: filling
between posts and buildings with white PVC lattice. I'm sure it wouldn't
stand up to chewing or real hard core pounding dogs, but for us so far
it's worked very nicely and we're applying it again this time around.
If one wanted to use something more substantial I would think about either
plywood or (for hard core fence-fiends) a cut down section of stiff panel
fencing.
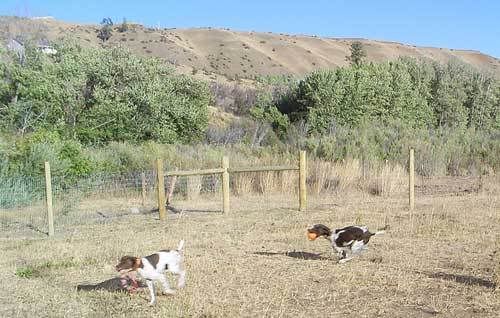
Thus it happened that the dogs were finally able to run around in their
yard again, even while the humans were too exhausted to care.
Our 'supervisor' had the day off with grandma and a visitor from the town
where I grew up. I think she spent most of the day eating or sleeping
or entertaining from what I could gather.

Aug 27
Unfortunately BabyCakes
shared her cold with me on Sunday, and then my camera started going on
the fritz, so it took me a little extra effort to get this last chapter
finished. The only remainders were cutting down the posts to similar size
(husband demanded that one, I would have been fine leaving it the way
it was), attaching insulators, and stringing the electric wire.

We put one string of hot polywire on the inside top, then one about 7"
off the ground on the bottom. This should prevent clambering over or digging
under. The insulators came with nails, but we opted for screws since they
would be less prone to splitting the already dry posts. There is a good
sized gap between the top wire and the fence itself... we haven't had
problems with dogs going over so I'm not too worried, but if this becomes
a problem we can always add another wire quickly and easily.
Husband also found a VERY handy little item: a wireless switch for the
power on the fence charger (something like this
one). This way if BabyCakes decides to go out in the dog yard we can
turn off the fence from the porch.
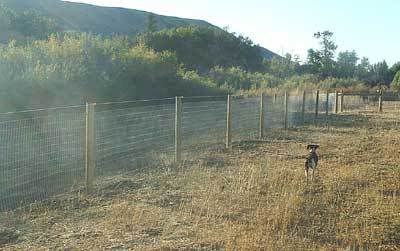
Anya is already quite wary of the little white zippy line on the bottom
of the fence, so it looks like we've succeeded. It's wonderful to have
a tight fence around a big area for them to run.